Monday, September 1, 2008

Top Note how-to

So, here I am again. Hmmm, can you tell what I'm doing with my 3-day weekend? LOL Thought I'd do a little tutorial on how I did the square and circle with the big shot and top note die.
Start with cardstock piece 4.25x5.5".

Make your "sandwich" from bottom to top:
cutting plate, die, cardstock, cutting plate
and feed through big shot.

I always use the same cutting plate on top
and, yes, it's supposed to get cut and look like that.
I'm saving my "bottom" plate uncut so that,
should Stampin' Up! offer embossing folders,
I'll be ready. :)


This is what you get after you run it through the big shot.

Note: save all your scraps...you'll see why in a bit.


Rotate your cardstock 90 degrees and center it on the die. Use the points of the cardstock and the die to be sure to lined it up straight. Run that through your big shot.

I'm leaving the top cutting plate off for the sake of the pictures. Be sure to replace it on top of your cardstock before each cut.


This is the square you get after the second cut. You can either use it like this or continue on to create the circle


For the circle you'll take your square and turn it 45 degrees to line up the 4 corners with the points on the die.


This is what you have after feeding it through the big shot.

Don't forget to save those scraps...


Now, turn that shape 90 degrees like so and cut.

Here it is after it's ride through the big shot.


And here is your final circle piece.


Now I hope you saved those scraps...

Because this is what you'll have left over.

A frame, 2 brackets and 4 photo corners.

I hope you'll enjoy your big shot as much as I am!!

(Customer ordering begins tomorrow!!!)

Thanks for stopping by.

The Top Note AGAIN???

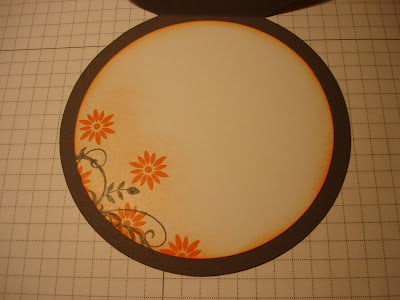
I just have to say, "I love the top note die!!" I made another card with it tonight. Last time I cut the cardstock 2 ways to make a square-ish element. Tonight I thought, "hmm, what happens if I cut it 4 times??" Well, the shape I got kind of reminds me of a sun. If only I had Life's a Breeze...
Here's the final product:

I even decorated the inside.


Thanks for stopping by!

Baroque Motifs stamp set; tangerine tango textured, basic gray and whisper white cardstock; basic gray and tangerine tango classic ink pads; big shot with top note bigz die; vintage brads; stampin' sponge; coluzzle; stamp-a-ma-jig

Saturday, August 30, 2008

Updates...

So, I learned today that some of you may be trying to leave comments without success. I took a look at my settings and, sure enough, I was excluding anyone without a blogger account. I updated my settings and they should work now. So, please, please, please leave a comment *begs her insecure inner-self*.

Please let me know if you have any problems. Of course, if you don't know me personally how will you ever let me know...since you can't leave a comment? Oh the conundrums of the blogging world.

Until next time...

More Big Shot Fun

I made this for a co-workers birthday next week. I cut the textured baja breeze and very vanilla with the top note sizzix die, turned it 90 degrees and cut again leaving a square as opposed to a rectangle. All layers are sponged with close to cocoa ink. I also used a new technique I learned at convention make & takes. I inked the flowering branch stamp in baja breeze, used my blender pen to remove the baja ink from the stems and inked them using the close to cocoa marker...huff and stamp.

Thanks for looking.

It's Your Birthday (retired) and Eastern Blooms stamp sets; baja breeze textured, close to cocoa and very vanilla cardstock; baja breeze and close to cocoa classic ink pads; close to cocoa marker and blender pen; chocolate chip polytwill (retired); Big Shot and Top Note die; snips and rounded corner punch